Arrow-Tip #45 Options for Managing Assigned Tasks Part I
I got some great feedback after posting Arrow-Tip #44 Outlook vs Sharepoint: Where to Put What – Part II regarding management of combined tasks from both Outlook and Sharepoint. After playing with the suggested solutions, I’ve learned some great new alternatives for managing tasks both individually or as an organization. Then I got a call from my pal Adam Halpern asking for ideas on how to manage tasks assigned to other people and it occurred to me that I have yet to create an arrow-tip for managing assigned tasks. So, Adam (and anyone else interested in using Outlook to assign and track tasks), read on for some great Outlook task management options.
In this post, I’m going to cover the first option for managing assigned tasks using Microsoft Outlook and Exchange. In subsequent posts I’ll cover options for managing Tasks using Microsoft SharePoint and then a combination of Microsoft Outlook/Exchange and SharePoint.
Option #1: Outlook Assignment Feature
Did you know that you can not only manage your own tasks in Outlook, but assign them to others and track their progress? Here is how it works:
Step 1: Open a new task and input the relevant information such as subject, due date and importance. You can also put details needed for the task in the note area.
Step 2: Click the Assign Task button on your Outlook 2007 Task Ribbon (for Outlook 2003 click the Assing Task button on your task tool bar or select Assign Task from the task Actions menu). A To field should now appear on your task – type the name of the person you want to assing the task to in the To field. (double click thumbnail below)
Note the check boxes below the due date field giving you the option to: Keep and updated copy of this task on my task list AND Send me a status report when this task is complete
Step 3: Now click the Send button and the task will be sent to the person you assigned it to.
Step 4: The task recipient (the person you assigned it to) will now receive the task assignment in his Inbox.
Step 5: This message will have and accept or decline button either in the preview pane or the tool bar/ribbon (double click thumbnail below)
Step 6: When the task recipient clicks the accept or decline button you will receive an email notifying you of his response.
Step 7: If the task recipient accepts the task, it will show up in his Tasks folder along with other tasks on his list. (double click thumbnail below)
Step 8: You should receive updates as the recipient updates the task. (double click thumbnail below)
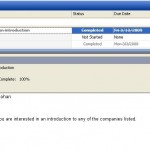
Step 9: As the task is updated and when it is completed, changes will also appear in the task in your Tasks folder (double click thumbnail below)
We’ve found this option very helpful for managing tasks within Advena Artemis. If you’ve used task assignment in Outlook, please leave me a comment on how it has worked for you. Also, for check out Arrow-Tip #46 Options for Managing Assigned Tasks Part II.


Helpful webpage in that the images proved that the Notes field should be updateable. We hadn’t been able to get this to work.
In our version of Outlook (2007) the receipient of the assignment needed to Accept the Task once in email to get it on their Task list and once from the Task list in order for their Status Report to go into the Notes field. Otherwise the Status Report is just an email that is not attached to the Task.
Glad the images were helpful and thank you for your comment, Russell!