How to Create Rules in Outlook
Creating Rules automatically filters the mail that comes through your Inbox. You can look for specific things in an e-mail a carry out a variety of actions with it, one useful one for example, is to automatically file certain e-mails in a specified folder. This How-To shows how to create a new rule.
To create a new Rule, select the Tools Menu > Rules and Alerts…
Select the New Rule… button.
![]()
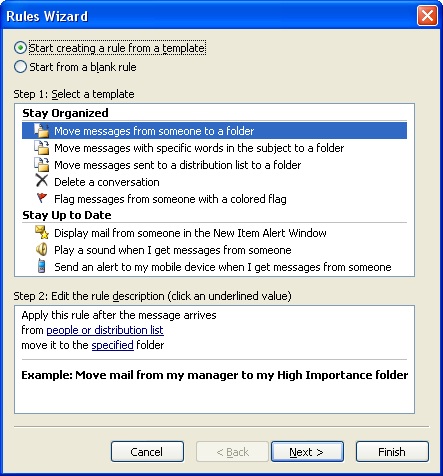
You have a choice of using a template or starting from a blank rule. To use the selected template, simply click the links people or distribution list and specified below to customize the rule. This particular template will move all e-mail from a specified e-mail address into the folder you select. Or you can select Start from a blank rule –shown in the following screen.
![]()
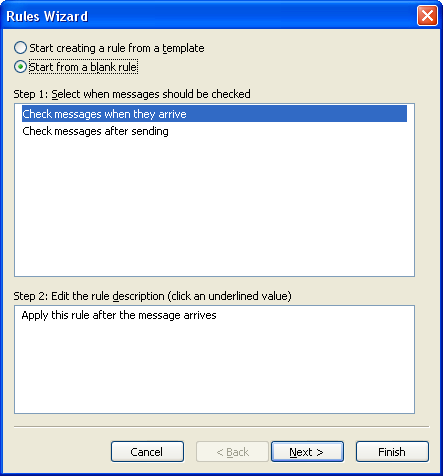
For this example, we will create a rule such that all e-mails from the domain name huntresspro.com will move into a folder called Huntress. To do this, under Step 1: select Check messages when they arrive. Click Next.
![]()
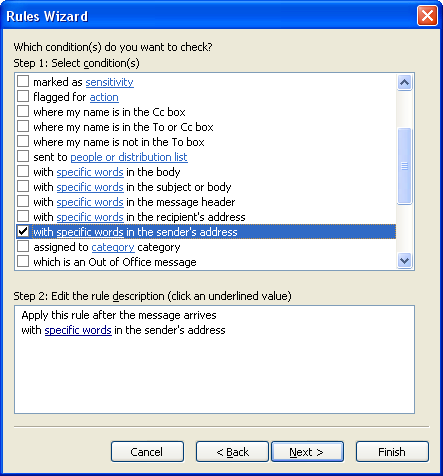
Check off: with specific words in the sender’s address. Now under Step 2, click the link specific words to enter the domain name.
![]()
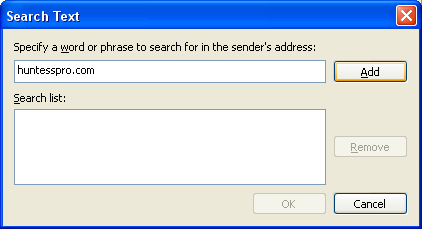
Type in the domain name. In this case, huntresspro.comClick the Add button and the domain name will move to the Search list. Click OK.
![]()
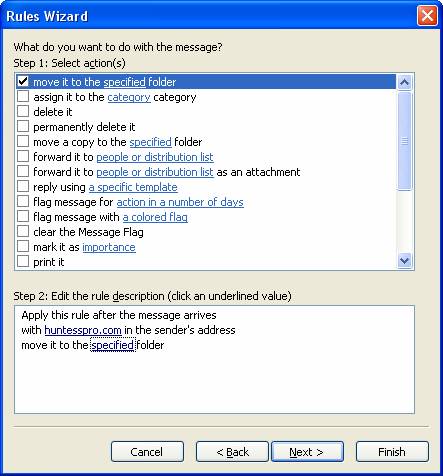
The next screen lets you select what you want to do with the message. In this example, check off: move it to a specified folder. Again, under Step 2, you must click on the word specified to select the folder.
![]()
Select the folder for this rule. If you need to create a new folder, click on the New… button to create a new folder. Click OK.
![]()
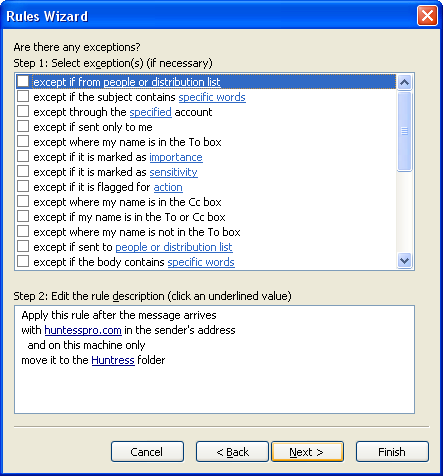
You can now select any exceptions to your Rule. This is an optional step. In this example, no exceptions will be selected.
![]()
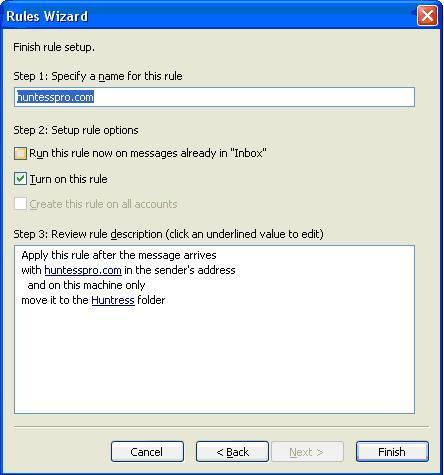
In the final steps, you can change the default name of this rule under Step 1. In Step 2, you have the choice to run the rule immediately on all the existing messages in your Inbox. If you wish to do so, click the checkbox. By default, the rule will be turned on. Before you select the Finish button be sure to review your rule under Step 3.
![]()
Once you have finished creating your rule, you will be brought back to the Rules and Alerts window and your new rule will appear. You can come back to this window to change this rule or to add more rules in the future.
[…] unknown wrote an interesting post today onHere’s a quick excerptFor this example, we will create a rule such that all e-mails from the domain name huntresspro.com will move into a folder called Huntress. To do this, under Step 1: select Check messages when they arrive. Click Next. image011.png … […]